Australian A-League Men

Adelaide United
LWLLW
4:1

Melbourne City FC
WWDWW
Friday, November 21 at 08:35 AMHindmarsh Stadium
Summary
First half
- Yellow card for Luka Jovanovic-5'
- ⚽Goal · E. Alagich12'
- ⚽Goal · L. Jovanovic15'
- Red card for Dylan Pierias36'
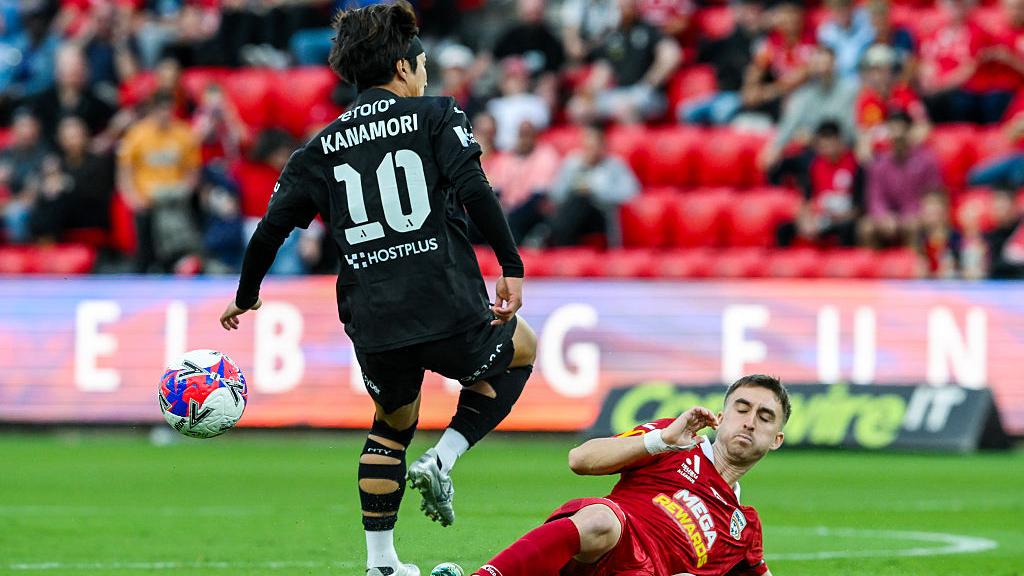
- 40'⚽Goal · T. Kanamori
- Yellow card for Panagiotis Kikianis45'
Second half
- ⇅On: J. Barnett46'
- ⇅On: P. Madanha46'
- ⇅On: R. White64'
- 65'⇅On: B. Mazzeo
- 65'⇅On: H. Shillington
- 65'⇅On: P. Antoniou
- 71'⇅On: B. Baker
- 75'⇅On: M. Memeti
- ⚽Goal · R. White79'
- ⚽Goal · J. Barnett84'
- ⇅On: A. Ayoubi90'
Statistics
31%Possession69%
1.31Expected goals (xG)0.86
11Shots10
6Shots on target1
1Corners6
12Fouls5
1Offsides1
0Saves2
2Yellow cards0
1Red cards0
71%Pass accuracy86%
Commentary
90'Austin Ayoubi (Adelaide United) Substitution at 90'Show full commentary
- 90'Austin Ayoubi (Adelaide United) Substitution at 90'
- 84'Jay Barnett (Adelaide United) Goal at 84'
- 79'Luka Jovanovic (Adelaide United) Yellow Card at 79'
- 79'Ryan White (Adelaide United) Goal at 79'
- 75'Medin Memeti (Melbourne City FC) Substitution at 75'
- 71'Beckham Baker (Melbourne City FC) Substitution at 71'
- 65'Benjamin Mazzeo (Melbourne City FC) Substitution at 65'
- 65'Peter Antoniou (Melbourne City FC) Substitution at 65'
- 65'Harrison Shillington (Melbourne City FC) Substitution at 65'
- 64'Ryan White (Adelaide United) Substitution at 64'
- 45'Jay Barnett (Adelaide United) Substitution at 45'
- 45'Panashe Madanha (Adelaide United) Substitution at 45'
- 45'Panagiotis Kikianis (Adelaide United) Yellow Card at 45'
- 40'Takeshi Kanamori (Melbourne City FC) Goal at 40'
- 36'Dylan Pierias (Adelaide United) Red Card at 36'
- 15'Luka Jovanovic (Adelaide United) Goal at 15'
- 12'Ethan Alagich (Adelaide United) Goal at 12'
Momentum
Adelaide UtdMelbourne City
⚽
⚽
⚽
⚽
⚽
1530456075
Top performers

Adelaide Utd
- Yaya DukulyShots2

Melbourne City
- Andreas KuenShots2
- Patrick BeachSaves2
Line-ups
Adelaide Utd4-4-24-3-3Melbourne City
1Beach
 16Behich
 4Bonetig
 22Ferreyra
 44Kutleshi
 30Kuen
19Schreiber
47Rahmani
⚽ 10Kanamori
10Kanamori 17Caputo
 15Nabbout
 12Yull
⚽9Jovanovic
19Dukuly
 23Duzel
⚽ 55Alagich
55Alagich 10Muñiz
 7Kitto
 4Kikianis
 3Vriends
20Pierias
 22Smits
Adelaide Utd
- 22Joshua SmitsG
- 4Panagiotis KikianisCD-L
- 3Bart VriendsCD-R
- 7Ryan KittoLB
- 20Dylan PieriasRB
- 23Luke DuzelCM-L
- 55Ethan AlagichCM-R
- 19Yaya DukulyLM
- 10Juan MuñizRM
- 12Jonny YullCF-L
- 9Luka JovanovicCF-R
Melbourne City
- 1Patrick BeachG
- 4Liam BonetigCD-L
- 22German FerreyraCD-R
- 16Aziz BehichLB
- 44Besian KutleshiRB
- 19Zane SchreiberCM
- 30Andreas KuenLM
- 47Kavian RahmaniRM
- 17Max CaputoF
- 10Takeshi KanamoriLF
- 15Andrew NabboutRF
Head to head
- Apr 26, 25Melbourne City FC0-0Adelaide United
- Feb 07, 25Adelaide United1-0Melbourne City FC
- Jan 25, 24Melbourne City FC1-0Adelaide United
- Oct 29, 23Adelaide United6-0Melbourne City FC
- Mar 03, 23Adelaide United4-2Melbourne City FC